Draw Your Own Cartoon Images
Published: 23 October 2004 • Tags: design
This tutorial will teach you how to make your own cartoon pictures, sometimes called “grabpics”, using an image editor. Using this method they come out totally clean and high quality.
We use Paint Shop Pro (version 5-7) in this article but the process applies to other image programs such as Photoshop or GIMP. The basic process is to use the line tool to trace over an image/screenshot on a new layer, colour it in, then delete the original image. Let’s get started!
Prepare your image #
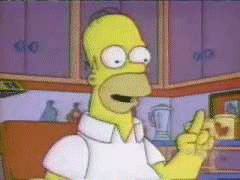
1. First step to creating grabpics is to find a suitable picture to trace. It could be a low-quality image you’ve found somewhere, a screenshot from a TV program, or something you scanned from a book or magazine. For this tutorial, I am using this picture of Homer Simpson:
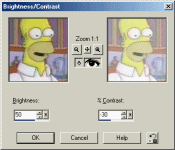
2. Cut off the excess (using the crop tool), increase the brightness and decrease the contrast [Shift+B]. Change the brightness to about 50 and the contrast to -30. This makes the drawing stage much much easier.
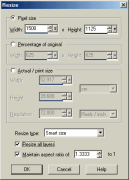
3. Now enlarge the image [Shift+S]. I usually use about 1200-1500 pixels wide, but you can use anything you like. Use the “smart size” resize type, as this prevents the image being too “pixelated” and makes it easier to trace.
This is a good a time as any to save. Save the image to a new file to prevent losing the original. Make sure you save the image as a Paint Shop Pro (*.psp) image so you don’t lose any quality, and keep the extra layer you are about to create. If you click options, you will see a list of a few different compression methods - choose “LZ77” as this has the smallest file size.
Trace the image #
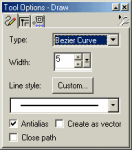
4. Next, create a new layer [Layers > New Raster Layer]. Choose the line tool icon on the left. Open the Control Palette [press O] and from the drop-down menu, choose the “Bezier” line type to draw curved lines. Set the line width to 5 and make sure anti-aliasing is on.
5. On the Layer Palette [press L], make sure that both the background (the original image) and new layer are visible (you will only see the background layer as the new layer is transparent) and that Layer1 is active (i.e. selected):
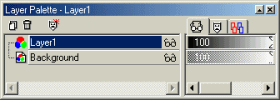
6. Start drawing! Trace around all of the lines using the bezier curve, until you have done them all. Your image should look something like this:
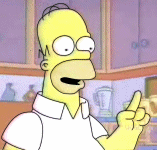
Don’t worry if the drawing is not great. Practice makes perfect, and you will soon get the hang of it.
Colour it in #
7. Now we have to color the grabpic. Make the background layer active, and press the delete key. The original image should disappear (if it doesn’t, try clicking back on the image again before hitting delete). You should be left with something like this:
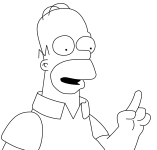
8. Select the Magic Wand tool. Click on an area, then holding the shift key, select all the other areas that will be the same color. It is useful at this stage to open the original image file to refer to. When you have done this, you need to expand the selection [Selections > Modify > Expand…]. Expand the selection by 2 pixels.
9. Open the original picture separately. Use the color picker to get the color from the original, or just choose whatever colours look best. Back in your PSP file, switch to the background layer and use the fill tool to fill the selection. Set the Match Mode to “None” to fill all the selected areas.

10. When you’re done, merge the layers [Layers > Merge > Merge All (Flatten)] and resize the image to 300-500 pixels wide. Decrease the colors to 256 [Ctrl+Shift+3], using “Optimized Octree, Nearest Color”.
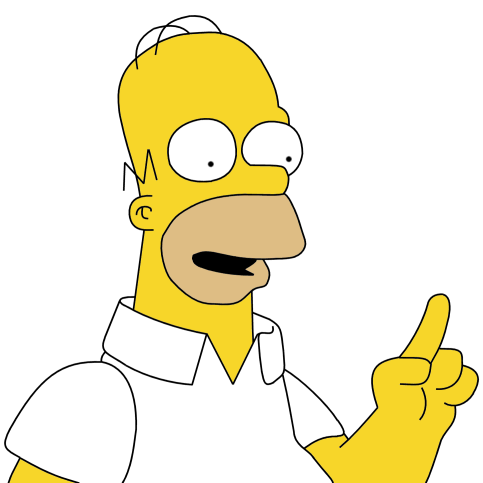
11. Save as a CompuServe GIF (*.gif) file. Congratulations! You have just made your first grabpic! It should look something like this:
Hints & Tips #
-
Shading: If the picture you want to draw has shading on it, this is relatively straightforward to draw. Simply create a new layer below the layer for your black lines. Choose the colour you want for the shaded part and trace it using the same method as before. Then, when it comes to colouring the image, you can either merge the two line layers (Layers > Merge Visible) or select the “Sample merged” option on the Tool Options palette.
-
Using Vectors: Another option when drawing pictures is to use vector lines instead of raster lines. On the Tool Options palette, select the “Create as vector” option. Then when you draw a line, a box will appear around it. You can use this to resize or move the line - this is very useful if you make a slight mistake with your tracing. You can also edit the start/end positions and curvature of each line: right click it and select “Node Edit”.
